Wednesday, July 1, 2009
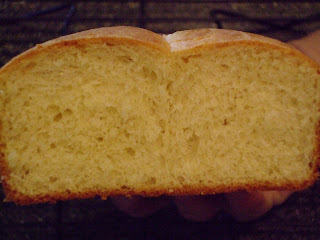
Challah! Only a few weeks after I made it!
So I have to say, I have never really liked Challah. I was tempted to just write "OK I made it." for my entire post and put one pic of the finished bread. And to be honest I still don't really like Challah. My wife and kids liked it, but I am just not a soft white enriched bread kind of guy. Give me a lean crunchy chewy bread any time. That's why I bake, but I joined this challenge to expand my horizons.
So I made Challah (Holla!) I couldn't help but channel my inner hip hop self which to be honest I never knew I had. I'm as suburban white middle class as they come.
Anyway, as I said, I've been busy. Crazy busy. So when I started baking I realized I didn't have my camera so my pics start right around the time of the dough coming together in the bowl.
Look at how yellow that dough is! I've been getting these amazing farm fresh eggs and the yolks are a bright orange! They taste amazing, but check out these yolks!
This pic doesn't really do them justice, but they are amazing.
I fermented it.
I divided and rested it.
I rolled the pieces into ropes.
And I made a five strand braid because a three strand just didn't seem difficult enough.
And this thing was huge!
So I baked it and my misshaped braids become apparent.
And yes it was huge and I guess it tasted OK. Like I said previously everyone loved it (except me). I won't be baking Challah again any time soon. If I want a Jewish bread give me a good rye. I can't wait for the ryes. My wife isn't looking forward to them, but she's having her day in the sun right now. I made my ciabatta just a few days ago, so I'm hoping to get that posted some time today as well. I may even get the cinnamon raisin bread baked today.
Wednesday, June 10, 2009
That's cä-sŭ-TEE-lō in my version...
Spam, it's pink and its oval,
Spam, I buy it at the Mobil,
Spam, it's made in Chernobyl,
Spam
And I love it anyway.
So after thinking long and hard about how I was going to prepare this I finally decided I was going to dice into a fairly large dice and roast in the oven @ 450 F until it was nicely browned and had rendered out a good amount of fat.
As usual I started with my mise and got the sponge going. Unlike the other formulas in the book, for this one I just followed it closely (other than the meat and cheese) and I was amazed by the amount of yeast. A whole tablespoon/.33 oz (and I also used ounces this time rather than the logically superior metrics I usually use) ?!?!?!?
My second biggest dilemma was deciding on what type of cheese to use. The obvious choice with Spam would have been Velveeta, but I couldn't go there. So I settled on that most American of cheeses Kraft Cracker Barrel white cheddar. Also, rather than grating it I went with a small dice to leave nice chunks of cheese in the crumb. I didn't want to turn the bread orange, and just because I used Spam doesn't mean it didn't deserve some respect. I let the sponge get nice and bubbly for an hour and then mixed up the dough and let it rest for 10 minutes. I then slowly mixed in the butter in four additions and mixed it for around the 12 minutes the book calls for and I was able to achieve a really nice windowpane.
Once I had my windowpane I tried mixing in the meat and then the cheese in the machine, but it just wasn't cooperating so I dumped it onto the counter and mixed by hand until I got a nice even distribution.
I greased the bowl and let it rise for about two hours (with a small interruption from the contractors I'm dealing with in the whole basement finishing we are in the middle of).
After it rose I measured the whole mass and determined I had about 1400 grams of dough so I measured two halves around 700 grams each and divided each into six pieces about 115 grams, give or take a few, and lined them up six each in a loaf pan as I had done for my brioche.
I let them proof in the pan for about an hour and a half (the temperature in my kitchen was PERFECT today) and I set the oven to 350F. I also baked some plain hamburger and hot dog buns today so my oven was already preheated. I baked them for 20 minutes and when I went to rotate them I baked them an additional 15. At that point they were perfectly browned and were right at 190 F.
I couldn't wait to cut into them and they cooled for maybe five minutes before I lost all willpower and made my first cut. Amazing! I may or may not do this bread again, but I have to say I loved it. I think I felt my heart stop for a minute after my third slice, but I made sure to take one of the loaves to my parents so I wouldn't gain everything back I've lost since the first of the year. The crumb on this bread was fantastic. I actually may make it again at Xmas time as my family is not really a raisin and dried fruit eating bunch, but it will definitely be a while. And for those of you who haven't made this one yet, I double dog dare you to try it with Spam! Or maybe chipped beef. S**t in a shingle!
Finally, Brioche!!!
Then when we returned from our vacation we began the process of finishing our basement. It has consumed my life for the past two weeks and as much as I can’t wait to get it finished, as I said it’s really disrupting my baking.
I actually took a day and made the brioche a while back, but I’ve been so busy I haven’t had the chance to update the blog.
To be honest, I really don’t normally care for brioche. The amount of butter is usually just too much for me. I prefer a good lean bread, but since I committed to this challenge so I will make everything. And even though my wife and I don’t care for raisins (I figure I’ll just donate the cinnamon raisin bread to my neighbors). Anyways, because of this I decided to make the middle class version of the brioche and scale it back so that I only had one small loaf.
For most of the recipes I’ve made so far in this book I use the baker’s percentages because I typically want either more or less of what the recipe calls for and I prefer using the much more logical metric system of measurement. Using the percentages and the metric system I decided I wanted a finished loaf that weighed 450 g because it’s approximately the same as a pound (actually I would have to say that it had 450 g of mass, not weighed 450 g, but I’m not a science or math teacher on this blog so whatever). My final measurements were
Sponge
Bread Flour 27 g
Instant Yeast 3 g
Milk 48 g
Dough
Bread Flour 164 g
Eggs 98 g
Salt 4 g
Sugar 12 g
Butter 95 g
Total 450 g
So first I got my mise on...
Then I followed the instructions as per the book and mixed the sponge and let it hydrate.
I got the kids fed and started putting on the show.
I'm using the KA this time because it's such a small quantity of dough.
I got a nice smooth dough and since it was such a small amount I used a small Pyrex dish to rest and ferment it in.
I opted not to buy brioche pans since I'm not real crazy about the bread in the first place, and I like the look of the six small rolls.
The one mistake I made was that I forgot to put on the egg wash here, but it still looked pretty good.
And finally although it looked pretty, it wasn't quite as dark or as shiny as it should have been for a brioche,
but the crumb was amazing and my wife and girls loved it!
I'm still not really crazy about brioche, but since the rest of the family loved it I'll probably be making this recipe again.
And maybe it was the vacation, but this was the least angry I've gotten while baking in a while. The dough was incredibly cooperative and like I said it was a hit for the ladies in the house. Maybe it just sensed what would have been in store if there was no cooperation.
Next up is Casatiello, and I've got a big surprise in store for this one!
Friday, May 22, 2009
Some pics
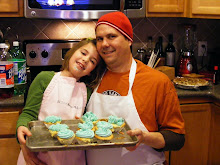
I'm getting ready, and have been for the past several months, for a big bike ride this summer. I don't know if any of you have heard about it, but it's called RAGBRAI, which stands for Register's Annual Great Bike Ride Across Iowa. 10,000 riders and 6 days of riding through small Iowa towns. So in preparation for this I decided I needed business cards for the many people I plan to meet along the way. I had been wanting to do this for a while, but I finally got it done. Being a stay at home dad I wasn't sure what I would want to put on a business card, but this place has finally given me the answer. I'm also throwing in a pic of me with my youngest from my photo shoot for the header. As you can see I'm really threatening around here. Thanks for looking.
Bagels are done!
And they are even better than I had hoped. Everything about them came out perfect. I ended up making 4 salt, 2 sesame seed, 3 plain, and 3 cinnamon sugar. So far I've had one salt and it was amazingly good and chewy.
I started the dough last night and so far for all of my breads for this challenge I have been using General Mills All Trumps flour. I bought a 50 pound bag a few weeks ago for $15 from our local bakery supply store and I am really happy with the results I am getting.
These are chewy and soft at the same time. The crumb is perfect. I will never buy a bagel locally again! There's no point when I can make them this good at home.
Unfortunately I didn't take a whole lot of pictures of the mixing and shaping process because to be honest I am really proud with my results from the shaping. I chose the rope method and they look easily as good as any bagel I've ever seen.
I mixed them on low speed until I achieved a windowpane and to be honest I was a little worried because my dough temp was almost 90 F. But I just went with it. Using the total weight of the ingredients I determined that there was a total of 56 ounces of dough, so I divided each portion into 4.75 ounces. I did a preshape, put my little one to bed, and came back and shaped them, let them sit for about 10 minutes, and they seemed like they had risen a little so I did my float test and they floated immediately. So I covered them up and threw them in the fridge for the night.
I woke up this morning and got straight to work. I got the oven going, got the pot of water on, and pulled the bagels out of the fridge. One of the things there was a little ambiguity about in the book is that he says use one tablespoon of baking soda, but there is no set amount of water. I have seen other recipes where there is a quarter cup for like six quarts, so I ended up just eyeballing a tablespoon or two into the water.
PR says if you want a chewier bagel, to boil them for 2 minutes per side, but I decided to split the difference and the first six boiled 1.5 minutes per side. The second batch, since they were going to the kids, I boiled for 1 minute on each side. I couldn't believe how much they swelled in the boiling water. This was also the only point where I almost lived up to my blog's name. For some reason, one of the bagels was sticking to the parchment and I thought I was going to lose it. I considered balling it up and throwing it against the wall to make sure the other 11 knew their place, but sensing its impending doom, I think it finally decided to cooperate.
I didn't have a lot of toppings, but I recently bought some pretzel salt, so I made four using that, then I topped 2 with sesame seeds, left three plain, and the final three were cinnamon sugar. My oldest daughter loves Panera's cinnamon sugar bagels, so I made a cinnamon sugar, then when the last batch came out of the oven I brushed them with butter, rolled them in the sugar, and returned them to the oven for two minutes. I may end up modifying this method because I do like the crunch Panera's get. I'm thinking I'll do this step at the rotation and it should make a nice cinnamon sugar crust.
Because I had two pans, I started one while I was boiling the other and just kept the oven at 500 F during baking. This method worked out great, and as you can see, with 10 minutes total baking time they came out perfect.
The crumb was amazing, the salt was a little heavy even for me, but overall these are the best bagels I have had in a long time. I can't wait to make them again.
So unfortunately I won't be able to bake for a few days becasue the family is going to Kansas City for a long weekend, but I get to eat a lot of BBQ, fried chicken (best in the country according to Jan and Michael Stern), and of course I'm taking a trip to Wheatfield's bakery in Lawrence, KS. So it won't be completely bread free weekend, just baking free. Maybe I can talk them into letting me help at the bakery.
Wednesday, May 20, 2009
It's Not Part of the Challenge, but I wanted Something Crunchy
I was craving a good crunchy white loaf of something last night, so I decided to make some Ciabatta from the BBA. I threw together the poolish around 8:00 last night and after I made it I decided that it wasn't necessarily what I wanted. I went to www.thefreshloaf.com and did a search for poolish and came up with a result for some baguettes. The recipe was slightly different, but I decided that using the basic baker's percentages I could use what I had and come up with something tasty.
My poolish was 107% hydration and I had a goal of 66% hydration with 2% salt and .36% yeast. The yeast was a little hard to calculate, but I decided an additional half teaspoon would be perfect. I used equal amounts of water for the poolish and dough, so I had a total weight of 24 ounces and at 66% hydration, I needed 36.4 more ounces. My final recipe was as follows.
Percentages
Bread Flour 100 %
Water 66 %
Salt 2 %
Yeast .36 %
Poolish
Flour 11.25 oz
Water 12 oz
Yeast 1/4 tsp
Dough
All of the poolish
Flour 25 oz
Water 12 oz
Salt .728 oz
Yeast 1/2 tsp
I mixed everything and let it autolyse for 30 minutes (only technically because a true autolyse would be without the salt)
I then mixed it in a Bosch Universal on first speed around 10 minutes until I achieved a windowpane.
I let it rise until it doubled (around 120 min)
Since I only have a pizza stone I made demi-baguettes and scaled them at 150 g each. (a true baguette is apparently scaled at 375 g according to Dan DiMuzio in his new book).
I scaled them, preshaped them and let them rest for around 20 minutes.
I then shaped them and proofed them on a couche for approximately 90 minutes.
During the last 30 minutes of proofing I preheated the oven to 500 F with the intention of lowering the heat to 460 F after steaming. Through trial and error (really very little error) I found that baking them at 500 F the whole time without lowering the heat after steaming as per BBA (misting 3 times every 30 seconds and using a steam pan) was perfect.
I ended up baking them 6 minutes then rotating 180 degrees and baking another 6 minutes.
They are perfect!
I must say I won this round and showed those ***** ******* who was boss in this kitchen!
I wish I had taken more pics of the process, but what are you going to do? I did get some great pics of the final loaves, and I am really happy with them.
Panera has nothing on me!
Tuesday, May 19, 2009
New Format, New Blog Name, New Focus
I love food. I love preparing food, I love eating, I especially love baking and I love being a dad.
As anyone knows who spends any time in a kitchen, things do not always go as planned and there have been times when I've gotten a little frustrated. My fantastic wife puts up with this character flaw wonderfully, but I figured I would embrace it in the new name of my blog.
I hope I have something of interest to say from time to time, so for those of you who will take a look, thank you and enjoy!
Sunday, May 17, 2009
Artos Bread is Complete
So I made the Artos bread yesterday and to be honest I wasn't really looking forward to it. Because of that I didn't take many pictures, just a couple of the final loaf. I stuck with the plain Artos because my family is really not into raisins and dried fruits and such.
I started the bread yesterday morning and it took forever to rise. It was cold in Nebraska yesterday. My bulk ferment took about four hours and by that time my family wanted to leave so I retarded it in the fridge and we went out for the day. I came back and took it out of the fridge and let it sit for about an hour, then I shaped it into a boule and let it rise. I started proofing around 4 yesterday afternoon and it wasn't ready to go into the oven until 9!
Although I wasn't really into making this particular bread, I was loving the smell. It was very reminiscent of baklava. The oven spring was incredible! I can't believe how big the finished loaf was. I have my top rack in the oven at the highest spot for my steam pan when I need it so there is a huge space between the racks, but it got to the point that I was worried about it rising into the top rack. Luckily everything was fine. I baked it for 20 min, rotated and then another 20. The loaf was beautifully browned, but of course it was time for bed by the time it was cool so I didn't get to taste it until this morning. It had a really soft crumb, softer than I prefer, but between my wife and kids half the loaf is gone an hour after they woke up this morning. My daughter loved it made into cinnamon toast. My wife is just having it plain toasted, and I had a slice with a little honey drizzled on. I'd really like to use this to make a baklava style bread pudding with some pistachios and honey.
Even after I tasted my first bite I didn't think I would want to make this loaf again, but I think it's the ginormous round loaf I don't care for. I think I probably will make this again, but I will bake it in loaf pans next time. Maybe almond butter and honey sandwiches?
Saturday, May 16, 2009
And a damn good bread it is...`
Using the percentages is in the book I made a batch totaling 2000 g (2kg) and scaled each loaf to 500 g. Unfortunately I ran out of the cornmeal I used on the previous attempt, and after reading about all of the grittiness reported form using polenta I used a regular store bought cornmeal.
I'm lucky right now in that I am using my mothers Bosch Universal instead of my KA. It really does a nice job and I think I've put it through more work recently than she has in the last few years. Even with the cornmeal I achieved a great windowpane. I'm working on Artos right now, I don't think my family will eat Christospomos.